It can take a long time to upload images to a website or send an email with lots of images attached. To save time uploading files it is a good idea to resize images first on your computer and then upload or attach the smaller files. Bigger websites like Facebook and Flickr will do this for you on your computer without you really knowing but in other cases you will need to resize the files first yourself.
If you do not have any graphics software and are using Windows XP then you can easily resize multiple images in one of two ways:
- Download the Windows XP Power Tool Image Resizer which adds a resize option when you right-click on a file.
- Utilise the E-mail this file feature that gives you an option to resize and save images – with the images resized the email can be discarded.
Windows XP Power Tool Image Resizer
Microsoft provides a tool that makes resizing images really simple. The Image Resizer download is available on the Windows XP Downloads page under the Power Tools tab.
- Download and run the Image Resizer installer following the installation instructions.
- With the Image Resizer installed right-click on an image, or selection of images, and select the new option called Resize Images:
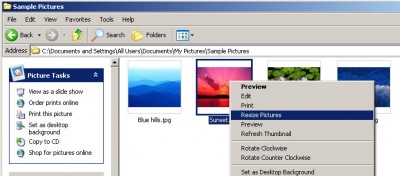
- A new window will then open allowing you to specify the image resize dimensions:
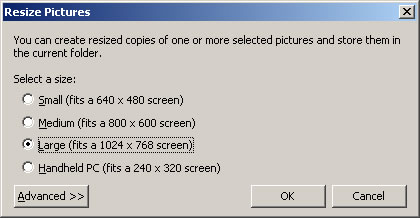
The Large size is probably the best option but you can use the smaller sizes instead. The Advanced button allows you to enter custom dimensions and gives you some other options too.
Using the default options resized images will be created as new files in the original folder and will be given a new name. When resizing images it is best to keep a backup copy of the full size image somewhere else.
Resize Images Using the ‘E-mail this file’ Feature
If you can not install the Image Resizer tool for some reason then you can use the E-mail this file feature to resize images instead:
- Open the folder that contains the images you want to resize:
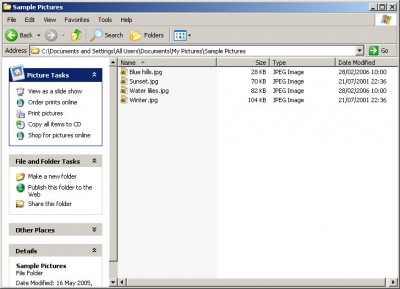
- If thumbnails are not being displayed then select Thumbnails using the Views button:
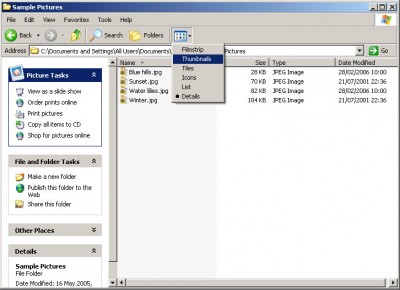
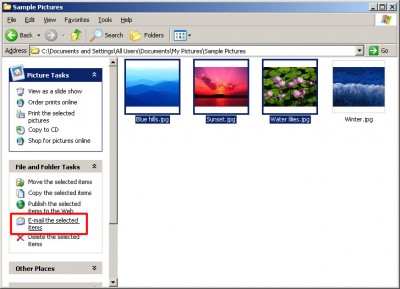
- Next select the files you want to be resized and click the E-mail the selected items option from the File and Folder Tasks menu:
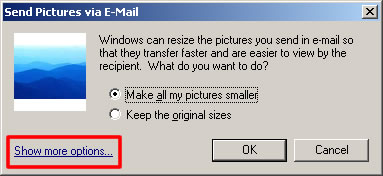
- A new window will be opened that allows you to specify how images are resized. Click the Show more options link for advanced options:
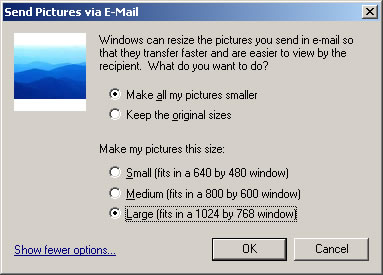
- Select the Large option for the image size and press OK.
- An email window will then open showing the images as attachments. Click the File menu and select Save Attachments:
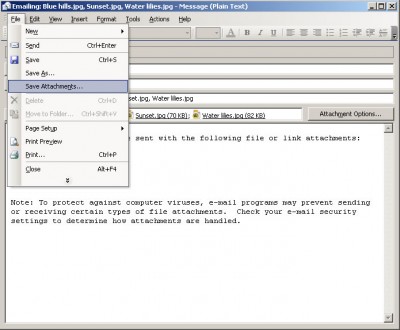
- Now you can specify where the resized images are saved. If you create a subfolder called resized in the original location it will be easy to find the resized images later.
- With the images saved the email window can be closed (or you can email the resized images).
- The resized images will now be considerably smaller in file size and so will be faster to upload to websites or attach to an email.
